This is lesson seven of a 10 ten-lesson course, Simple CodeIgniter App, which walks you through the creation of your first PHP web application using the CodeIgniter framework.
We now have a database to store our data, which is great, but it’s currently just sitting out there in space without any outside contact.
We need to hook it up to our app so we can start utilizing it. It’s time for this app to start using some real data!
Configuring our app to use the database
As I mentioned previously, CI has great built-in support for interacting with a database, but we still need to tell it how to access our database so they can begin to communicate.
The CI database configuration
As with other configuration files you’ve seen previously, the database configuration file is also stored in, you guessed it, the application/config directory at application/config/database.php.
If you open up that file, you’ll notice some, mostly empty, database configuration options at the bottom, as seen here:
.
.
.
$db['default']['hostname'] = 'localhost';
$db['default']['username'] = '';
$db['default']['password'] = '';
$db['default']['database'] = '';
.
.
.
The options above—hostname, username, password, and database—are the ones we’re concerned with.
They tell our app: what computer/server the database is located on (hostname); what username to connect to the database with; the password associated with that username; and the name of the database.
In order to connect our app to the database we created previously, update those four options with the values shown below:
.
.
.
$db['default']['hostname'] = 'localhost';
$db['default']['username'] = 'root';
$db['default']['password'] = '<your-root-password>';
$db['default']['database'] = 'summer_of_coding';
.
.
.
Make sure you set the password value to the password you set for the MySQL root user back when you installed WAMP/MAMP in Lesson 2, which, again, is most likely either blank (i.e. an empty string, ”), or ‘root’, by default.
This tells CI, by default, to connect to the database server on our own computer— referred to as localhost in web development—using the designated username and password. And then we designate that it should pull data from the summer_of_coding database we established in Lesson 3.
“Auto-loading” the database library
We’ll be utilizing our database very frequently, so we’re going to “auto-load” CI’s database library, which will make it automatically available throughout the app.
Go ahead and open up the autoload configuration file — application/config/autoload.php — locate the $autoload['libraries'] setting, and alter it to auto-load the database library, as shown here:
.
.
.
$autoload['libraries'] = array('database');
.
.
.
We’ll now have access to the database functionality throughout our entire web app.
Testing our database connection
Now that we’ve configured the necessary settings in CI, let’s make sure our app can access our database properly.
Since we’ve told our app to automatically load our database via auto-loading, it’s simple to test our database connection. Simply visit the main welcome page:
http://localhost/todos-app/index.php/welcome
If you see the typical CI Welcome page, that’s great! Your app is properly connected to the database.
Otherwise, if you an error message such as the one shown below, double-check your root password and review the configuration settings above to make sure you entered everything correctly.
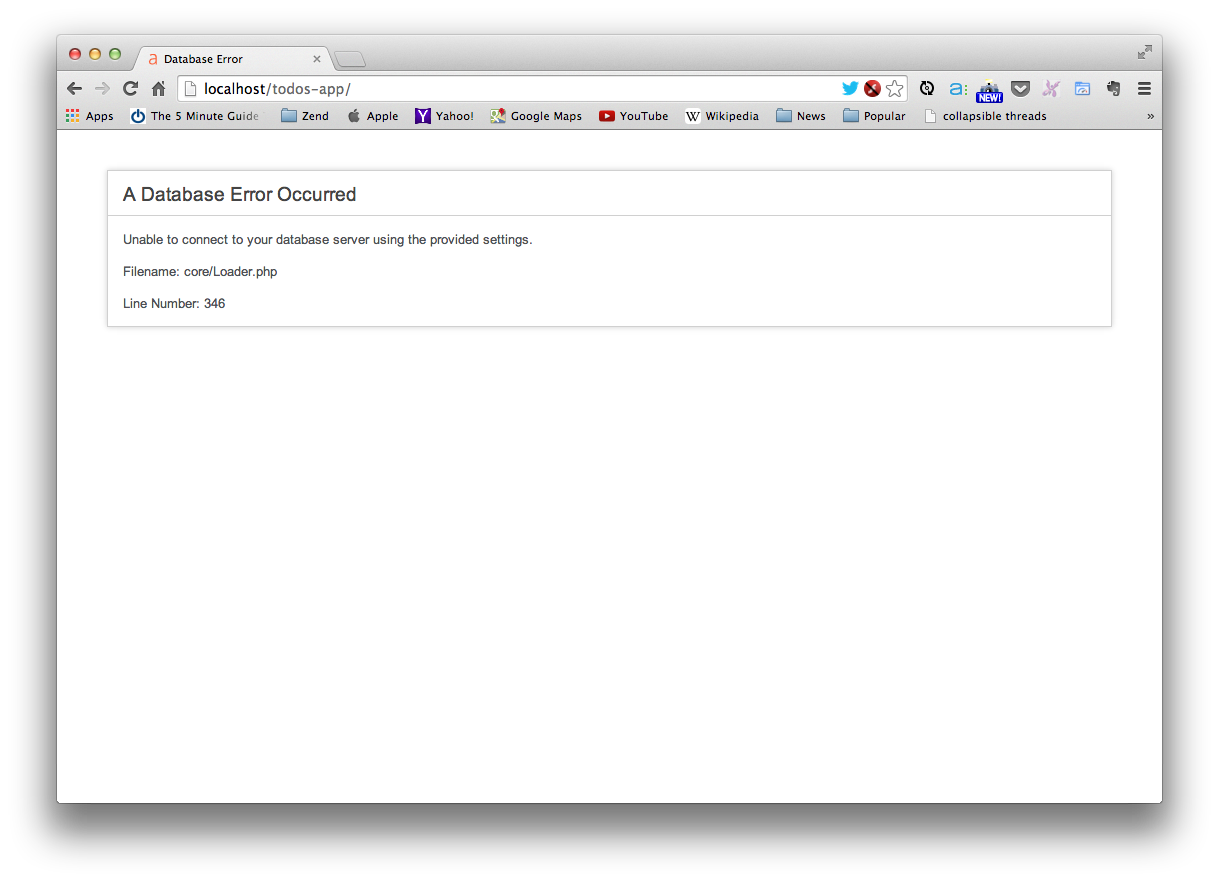
CodeIgniter database connection error message
Our first model
Back in Lesson 5, we discussed the MVC paradigm that our app will utilize.
If you recall, the M of MVC stands for model. Models serve to represent the data objects retrieved from our database so that they can be utilized throughout our app.
We’ll be utilizing models to represent the todo data objects in our app.
A model for our todos
As they’re intended to serve the same general function—representing a type of data object—each model starts out just about the same.
Remember that all of our app’s code will live in files in the application folder, with our models being stored in the application/models subdirectory.
Go ahead and create a new file in the application/models folder named todo_model.php with the code shown here:
<?php if ( ! defined('BASEPATH')) exit('No direct script access allowed');


class Todo_model extends CI_Model {


  function __construct() {
    parent::__construct();
  }


}
We’ve seen the first line before:
<?php if ( ! defined('BASEPATH')) exit('No direct script access allowed’);
It just prevents outside users from view the contents of this file, for security reasons, and because they just don’t need to be viewing it!
The next line opens our new Todo_model, which is a class:
class Todo_model extends CI_Model {
Classes are a generic structure used in many cases. Remember that our controllers are classes as well.
Curly Braces
As always, just as with all main constructs in PHP, our class is opened with an opening curly brace,{, and closed with an ending curly brace,}.
The next thing you’ll notice is a function named __construct. It may look a little strange, but all you need to know for now is why it’s there. The __construct method is our model’s constructor, and it allows us to create objects (or instances) based on this class, or data objects, as they are in this case.
As we discussed previously, models help us represent our various types of data objects, such as a todo in this case. The constructor allows us to create todo objects to represent specific todos. So, for example, we could create a todo object that represents a “Take out the trash” todo in our database.
Retrieving our todos
Besides allowing us to represent data objects, one of the major responsibilities of a model is to interact with our database. Let’s implement a way for our Todo_model to retrieve all of the todos in our database.
Go ahead and add the get_all_entries function below the constructor in our Todo_model as shown below, and then we’ll walk through it, step by step.
.
.
.
function __construct() {
  parent::__construct();
}


function get_all_entries() {
  $query = $this->db->get('todos');
  $results = array();
  foreach ($query->result() as $result) {
    $results[] = $result;
  }
  return $results;
}
.
.
.
This is your first taste of interacting with our database via CI, and as I mentioned, its built-in database functionality makes things quite easy for us.
As we progress through building the app, you’ll continue to notice that there are a lot of places throughout our code where we need to store certain pieces information so that we can reference them at a later time or pass them off to a different part of our app.
Luckily, as we discussed in a previous lesson, variables make it very easy for us to do just that.
Right off the bat in our get_all_entries function, the first line is storing something in a variable, $query:
$query = $this->db->get('todos');
What’s being stored in the $query variable is the database query to retrieve the todo entries from the todos table in our database.
$this->db is a reference to CI’s internal database library, and the reason we have access to it here is because we auto-loaded earlier.
By calling CI’s database get function, we can retrieve items from a specific database table. In this case, we’re passing the get function just one parameter: the name of the database table to retrieve records from.
If we were to translate our database call to an SQL query, it would look like the following:
SELECT * FROM todos
which, says to our database, “get all of the information for all of the entries in the todos table.”
Now that you have an understanding of you what’s going on behind the scenes with our database query that’s formed by calling the db->get method, let’s take a look at how to retrieve the results of that query, or the todo entries that will be returned.
Preparing to store our results
After our query, the first thing you’ll notice is the following line, which creates a new array and stores it in a new $results variable:
$results = array();
As we discussed in a previous lesson, an array is a data structure—a way to store and represent data—that allows us to store multiple different pieces of data at once, making it perfect for storing the various todos we may be retrieving.
Retrieving our results
Since we’re (potentially) retrieving multiple todo entries, we need a way to get, and store, each one. To do so, we’ll be using a loop, which we also discussed in a previous lesson.
Looping through our results and storing them in an array
The results-retrieval code in get_all_entries function is as follows:
$results = array();
foreach ($query->result() as $result) {
  $results[] = $result;
}
CI makes retrieving each entry, or result, quite easy. We simply call the result method on our query (which we stored in the $query variable):
$query->result()
As shown in the figure below, every time the code moves through the foreach loop, the $query->result call is retrieving the next available entry.
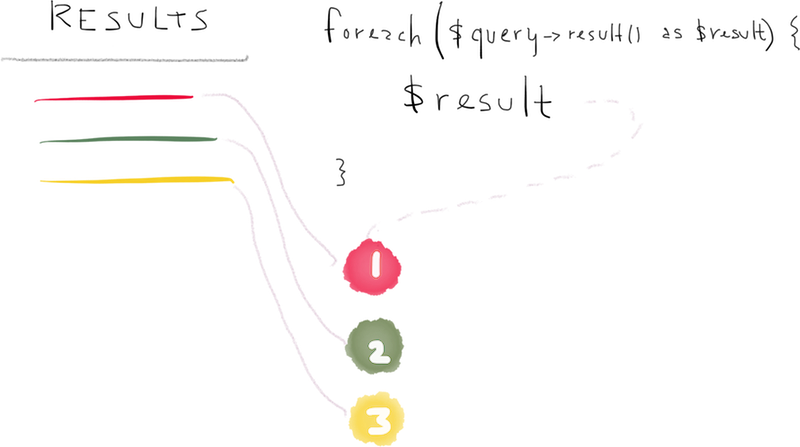
CodeIgniter database result retrieval using a loop
That means that the first time we go through the loop, $result will contain information for our first entry; the second time we go through, it will contain information for our second entry; and so on, until we’ve retrieved the information for all of our todos, at which point the code will automatically stop going through the loop.
Every time we go through the loop, as mentioned, the current entry is contained in the $result variable (just as we saw in the foreach loop examples in Lesson 4). That makes it very easy to add all of our todos to our $results array—every time we’re in the loop, we add the current $result to our $results array.
That way, once we’ve finished looping through all of our todos—and thus exit the foreach loop—our $results array will contain all of our todos, exactly as we desired!
Finally, we return that $results array so that we’ll be able to use it elsewhere in our app:
return $results;
As we discussed in a previous lesson, functions can return a value in order to make it available at the place in the code where the function was originally called.
Ordering our results
As we’ve discussed in the past, we can order the results of a query by adding an ORDER clause (database query) (i.e. a part of the query).
If you recall, our todos table contains an order column that we’ll be using to store the proper order number of each todo entry. Let’s make a slight modification to the query in our get_all_entries function in order to properly order the todo entries according to their order column values:
.
.
.
function get_all_entries() {
  $query = $this->db->order_by('order', 'ASC')->get('todos');
  $results = array();
  foreach ($query->result() as $result) {
    $results[] = $result;
  }
  return $results;
}
.
.
.
You can see the addition of a call to a new method (remember that method and function are synonymous), order_by. We pass it the name of the column we wish to order by, 'order', and 'ASC', designating that we want to order the results by their order column values in ascending order.
Recap
We covered a lot of new material in this lesson. More precisely, we applied a good deal of the theoretical knowledge you previously acquired, such as:
- the structure of databases;
- running queries to retrieve information; and
- using models to aid in that process.
We now have these great functions that actually retrieve data from our database, but we have one problem: there’s currently no way for a user to access and view this data. For that, we need to create a new controller and a view.
In the next lesson, that’s exactly what we’ll be doing.
Week 7 Task
In this week’s task, you’re going to create a new function in the Todo_model.
We won’t necessarily use this new function, but it will give you a chance to further familiarize yourself with CI’s database functionality.
Create a new get_completed_entries
Add this new get_completed_entries function to the existing Todo_model. It should adhere to the following specifications:
- Retrieve on the completed todo entries (i.e.
completed= 1 in the database). - Order them by their task text in descending order (so in reverse-alphabetical order).
- Retrieve only the first twoitems that fit the above specifications.
In order to assist you in creating this new function, reference CodeIgniter’s database documentation.
When you finish, leave a comment with your completed query code, explaining what each piece of it accomplishes.
If you have any questions, either shoot me an email or leave a comment and ask away! I’m always here to help.
Happy coding!