This is lesson three of a 10 ten-lesson course, Simple CodeIgniter App, which walks you through the creation of your first PHP web application using the CodeIgniter framework.
One of the key elements to consider when building a web app is the data.
Data, or information, is what really gives an app power and purpose. Sure you can create a really fancy app like Twitter, but without all of its information—in the form of tweets, in Twitter’s case—stored, retrieved, and viewed, it’s really quite useless, if you think about it. Just as knowledge is power, information is power, as well.
What is a database?
You can think of a database as a sophisticated, digital filing cabinet. It’s what will help us organize all of our app’s data. We can add, update, and remove pieces of data from our database, at will.
Databases are comprised of tables, which you can think of as file folders. Tables are comprised of records, or rows, which you can think of as individual documents within one of the file folders, as depicted below.
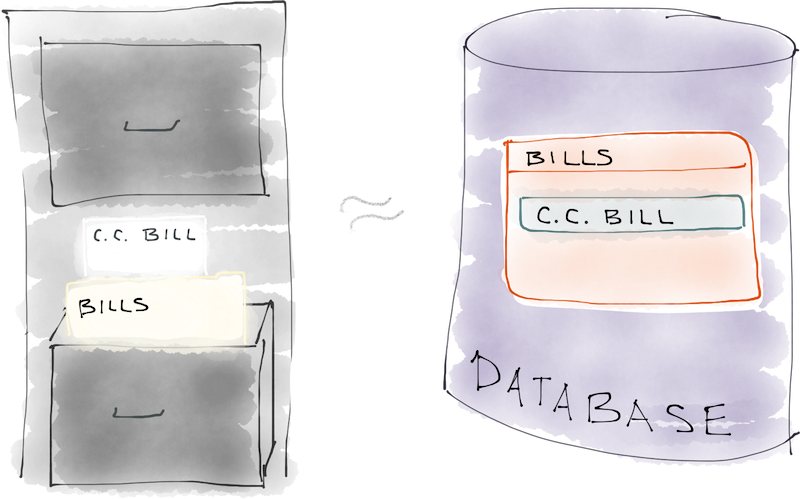
So say, for example, we have a filing cabinet, and it contains a folder labeled “Bills Paid”. Within that folder, we have records of payments for various bills. We can store data in a database in the same exact way.
Say we have a database, and it contains a table named bills_paid.
Note: Naming Conventions
Almost always, when giving things names in web development, we use a format that doesn’t contain any spaces, hence the name bills_paid as opposed to something like “Bills Paid”.
We can add new records to that table each time a bill is paid, just as we could have added new pieces of paper to our file folder. Our records can contain various pieces of information, such as the bill number, amount, and date paid.
Why data is important
Without data, a web app doesn’t provide much value. Think of it this way…
Imagine Facebook as it is now—with all of the same features, functionality, and options—but without anyone actually using it—without anyone providing any data.
Not all that intriguing, right? Would you want to use Facebook if no one else was? Don’t think so. That just goes to show what an important role data plays in a web app. Someone can build a web app with as many fancy features as they can imagine, but if there’s no data going into it (or coming out of it), it’s hard to imagine it providing any value at all.
What role will a database play in our web app?
The database will give us the ability to collect, store, manipulate, and display data throughout our web app.
Let’s use Facebook as an example, again. When someone “likes” something on Facebook, that is stored in a database. When someone fills out their profile— providing information such as their name, age, and location—that’s also stored in a database. When you view your news feed, all of those posts, pictures, and updates are being retrieved from a database. Without data, and a database, there is no Facebook as we know it.
As such, the database plays a crucial, integral role in a web app. It allows us to bring meaning to everything, providing context for all parts of the app. Information is the key, and the database allows us to populate our web app with it.
Retrieving information from a database
As mentioned before, we also have the ability to retrieve information that has been added to our database. Say, for example, you want to view all of the bills that you paid the previous month. Well, as you’ll see in just a few minutes, there’s a way to retrieve exactly that sort of information from the database via what’s known as a query.
A query is command that we can send to our database, which tells it to perform certain operations.
So, for example, a query to retrieve all of the records for the bills we’ve paid may look something like this:
SELECT * FROM bills_paidThe code above is known as SQL, which is the language that can be used to communicate with our database. If you’ve been paying close attention, you may remember that the type of database we’ll be using in our app is known as MySQL, which we installed in the previous lesson.
The SQL language is a universal language used among many different types of databases, including ours, MySQL, which also happens to use the SQL name as part of its own.
In any case, that little snippet of SQL would say to our database: “please select all of the records from the bills_paid table”; the * signifies to select all columns, or pieces of information, for each record.
Different data types
As you’ll see when we create our very own database in just a minute, different pieces of data in a database are of different types. There are a few major data types:
- string – pieces of text
- numeric – numbers, in various forms (e.g. integers, decimals)
- date / time – you guessed it: dates and times!
- boolean – true/false values
Those four major data types encompass nearly all of the different pieces of data that you could wish to store in a database.
Week 3 Task
1. Building our app’s database
Now that we have some knowledge into the inner-workings of databases, it’s time to create one of our own so we can play around with it and get a feel for how it really operates.
The database we’re about to create is the one we’ll use to store data for the todo list app we’ll be building throughout the remainder of the course.
Accessing phpMyAdmin
In order to view, and interact with, our database in a nice interface via a web browser, we’re going to utilize a tool named phpMyAdmin, which is actually a web app app of its own, written entirely in the PHP language (hence the name).
Luckily for us, when we installed MAMP/WAMP in the previous lesson, phpMyAdmin was automatically installed in addition to the other software.
Simply open up a new browser window and enter the phpMyAdmin URL— http://localhost/phpmyadmin—to access its interface. (There should also be an item in the MAMP/WAMP control panel, or on the MAMP/WAMP start page, which you can use to open it.)
Logging into phpMyAdmin
When you initially access the phpMyAdmin interface, you should be presented with a simple login screen, asking for your username and password, which should appear similar to this:
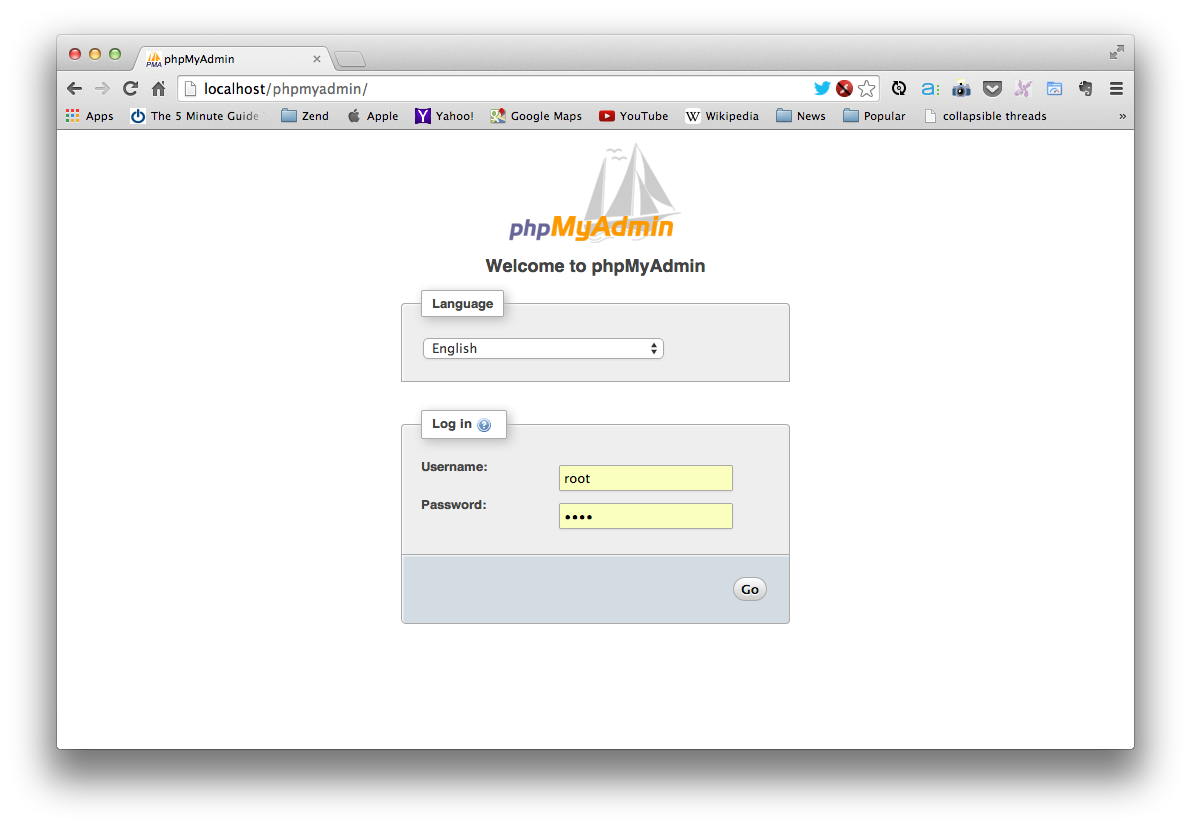
Here’s the first place we’ll need to use one of those passwords you made note of when installing WAMP/MAMP.
We’ll be using the MySQL root user credentials, so the username should be root, and the password is whatever you chose during installation (it probably defaulted to a blank password or root, the same as the username).
Once you’ve logged in, you’ll be presented with the phpMyAdmin interface:
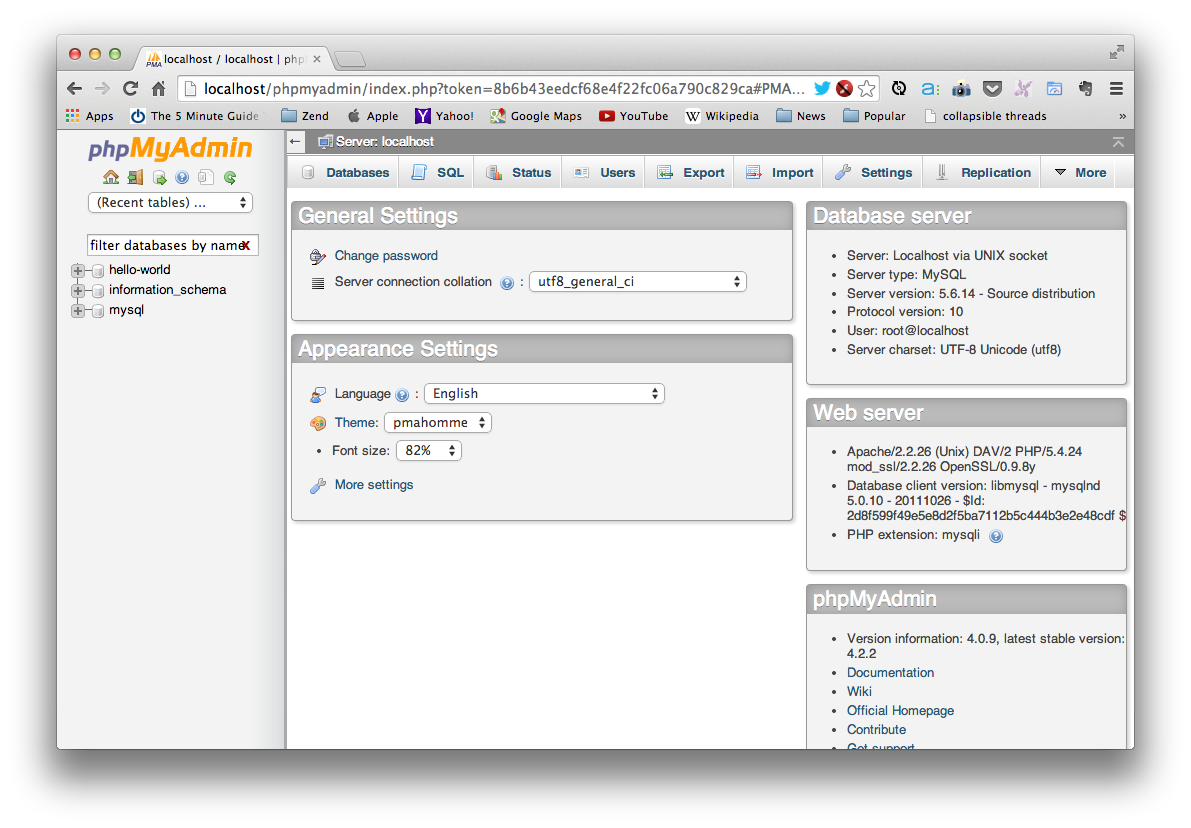
The left hand column contains a list of all of the databases you currently have. There are most likely two: information_schema and mysql. (In case you’re curious, the mysql database contains information about the MySQL database server, and the information_schema database contains information about all of the other databases on your computer.)
Now that you’ve logged into phpMyAdmin, we can create our own database.
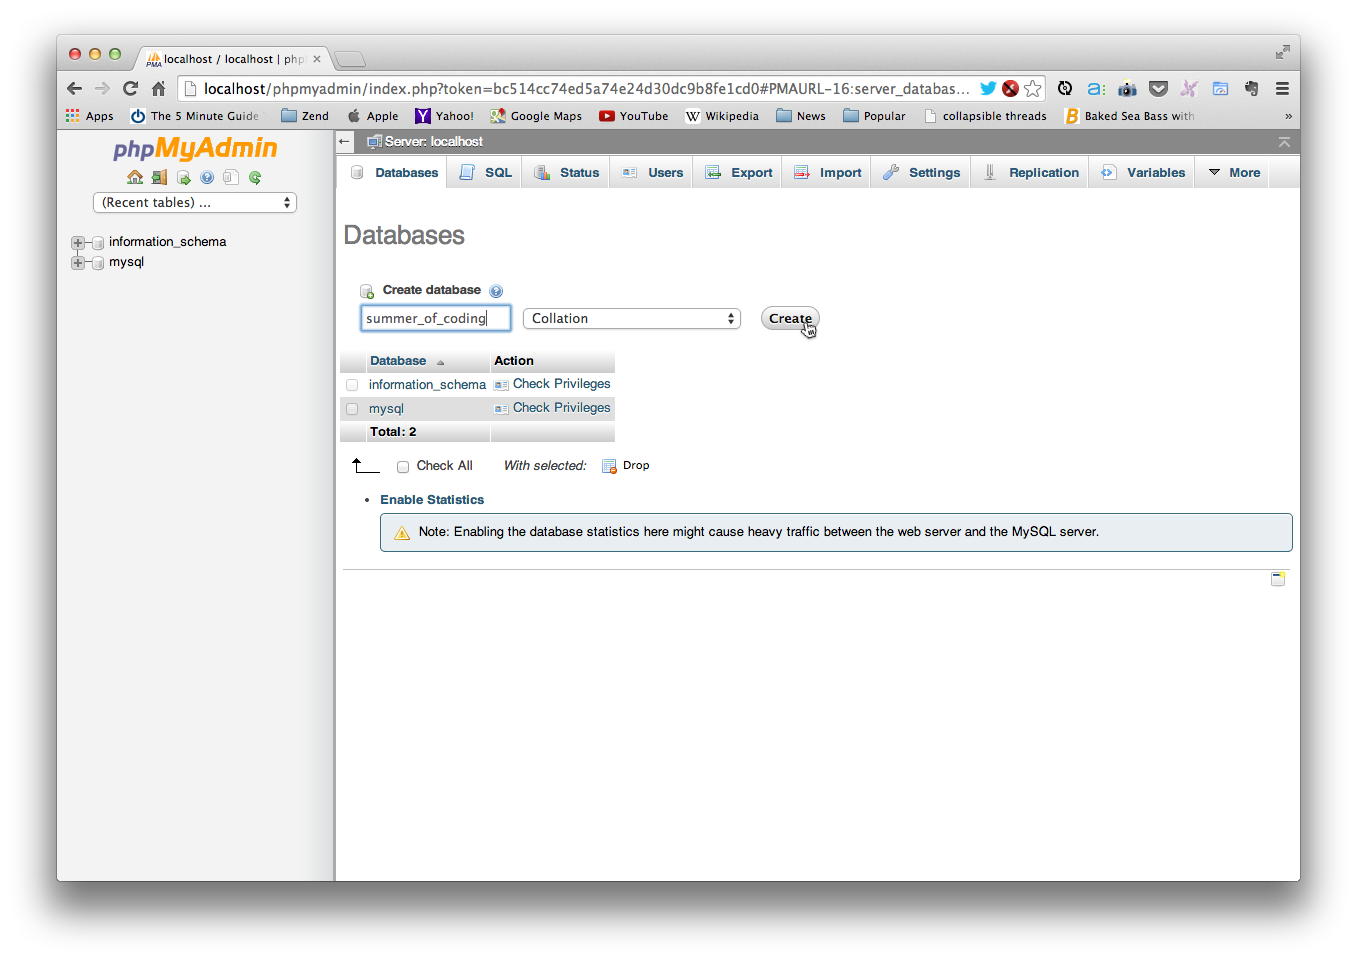
At the very top of your screen you should see a button/tab labeled “Databases”— click that to enter the Databases interface, where you should again be presented with a list of all of the databases. (If you don’t see that button, click the phpMyAdmin logo up the top left to return to the app’s home.)
Above that list there should be a form labeled “Create new database” with a text field. Enter “summer_of_coding” into the text field, as show below, and click the “Create” button, which will create our new summer_of_coding database.
Click the “summer_of_coding” link in the left-hand column to view our new (currently empty) database.
So, revisiting our analogy from before, we now have our “filing cabinet”: the summer_of_coding database. Let’s add a “file folder”, or table, to the database.
Creating our todos table
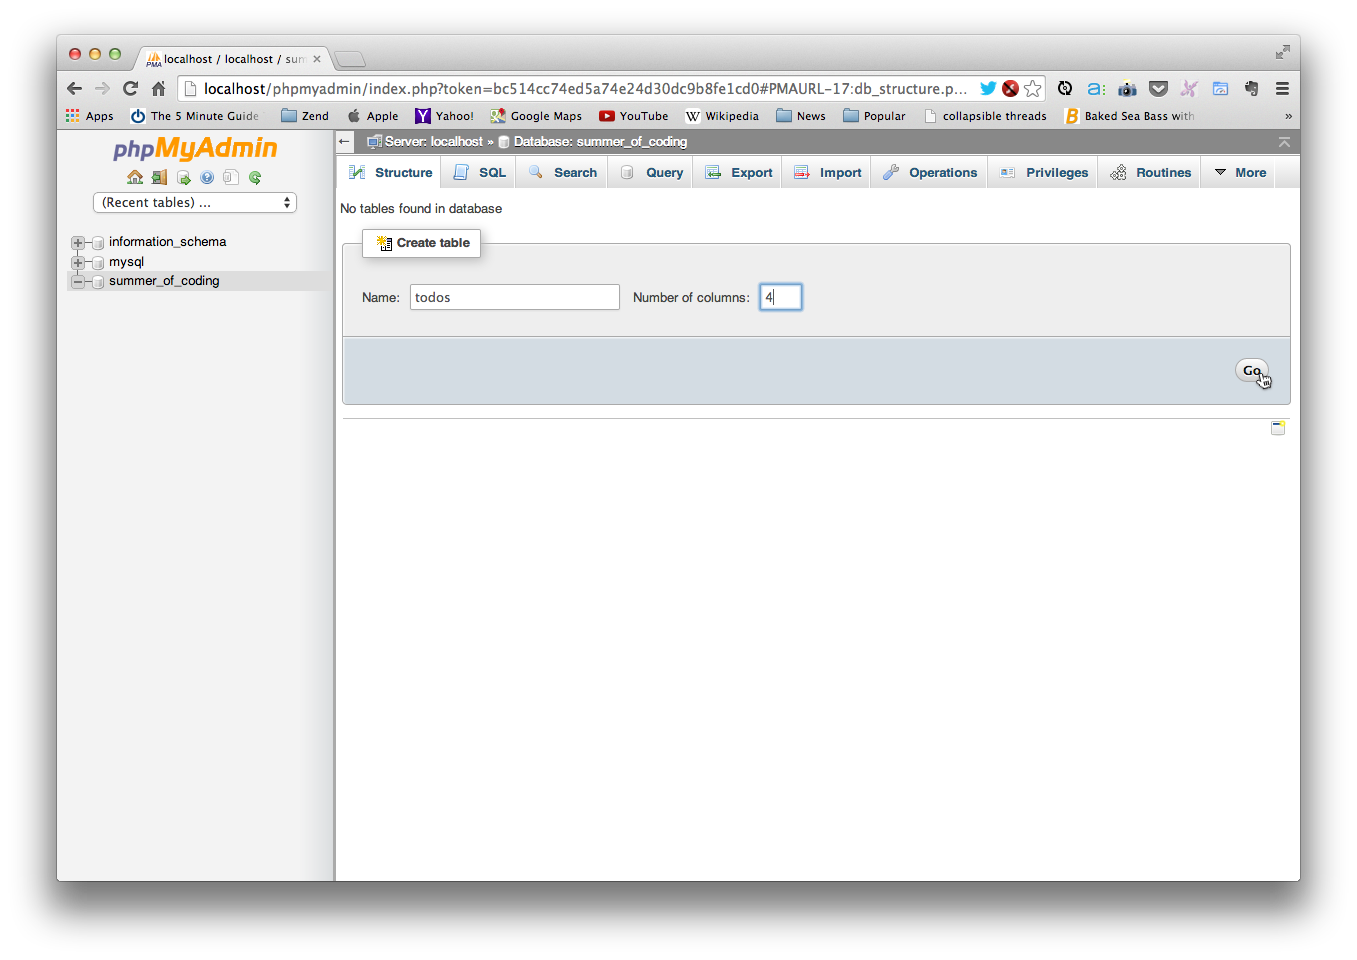
After clicking “summer_of_coding” in the left-hand column, you should be presented with a “Create table” form.
We’ll be creating a table to store entries representing our todo items, so enter “todos” for the table’s “Name” and 4 for the “Number of columns”—as shown below—and click “Go”.
You should then be presented with a form to enter all of the information for our table’s columns. It may look a bit overwhelming at first, but don’t worry, it’s really quite simple.
Below the “Table name” in the form, you’ll see a grid with the first two columns labeled “Name” (for the column’s name) and “Type”. This will allow us to define the different pieces of data we wish to store in this table.
In our case, since we’ll be storing information about todos, we’ll define the following columns:
idtaskordercompleted
(Again notice that, as before, we’re using names that are all lowercase and that don’t contain any spaces).
Defining our table’s columns
Go ahead and enter the names above into the text boxes in the leftmost column under the “Name” header. Those will be the names of our columns.
Now we have to define the types of data we’ll be storing. Let’s go through each column one-by-one:
1. id
Note: Every table should always have an id column. Just needed to make that very clear!
The id column stores a number that’s unique to every record in the table.
It will be an auto-incrementing integer, meaning that each new record will be automatically assigned an id value, starting at 1, with each subsequent record receiving an id value of one greater than the previous record’s.
So, for example, our first record’s id value would be 1, our second’s 2, our third’s 3, and so on. This ensures that every record has a unique id value, which, as you’ll see, will allow us to retrieve a record simply by knowing its id.
For this column, select INT from “Type” dropdown menu, then scroll to the right and choose PRIMARY from the dropdown in the “Index” column, and check the checkbox in the “A_I” column.
INT stands for integer; PRIMARY designates that this is the primary key— the unique value that we can identify each record by; and “A_I” stands for auto-increment, which tells the database “every time I add a new record, automatically assign it an id value that is one greater than the previous record’s.”
(That may have felt like a great deal of explanation for one column, but it’s important information to possess, as the id column will function identically for every database table you’ll ever create.)
2. task
This will store the name of the todo task, which is just a piece of text (as far as the database is concerned). In MySQL we’ll use the type varchar (data type), which refers to a string a varying length, as tasks can be any number of characters in length.
So choose VARCHAR in the “Type” dropdown in the second column and enter 200 in the “Length/Values” text input. The length refers to the maximum number of characters we can enter. Two hundred should be just fine, for our purposes.
3. order
This will store the todo item’s order within the list. (So, for example, the first item’s order will be 1, and the third’s would be 3.)
So this is a numeric piece of data. For the “Type”, choose INT (again, for integer), which will be perfect for this case (as we only need to store whole numbers).
Additionally, if you scroll to the right, you should see a column labeled “Attributes”. Choose UNSIGNED from that dropdown, which designates that our number can only be positive, never negative.
4. completed
This will store whether or not the todo has been completed. This value can be only true or false, so select BOOLEAN under “Type”.
Once you’ve filled out all of the necessary column information, your form should appear similar to the one shown below. Click the “Save” button below the form to complete the creation of your todos table.
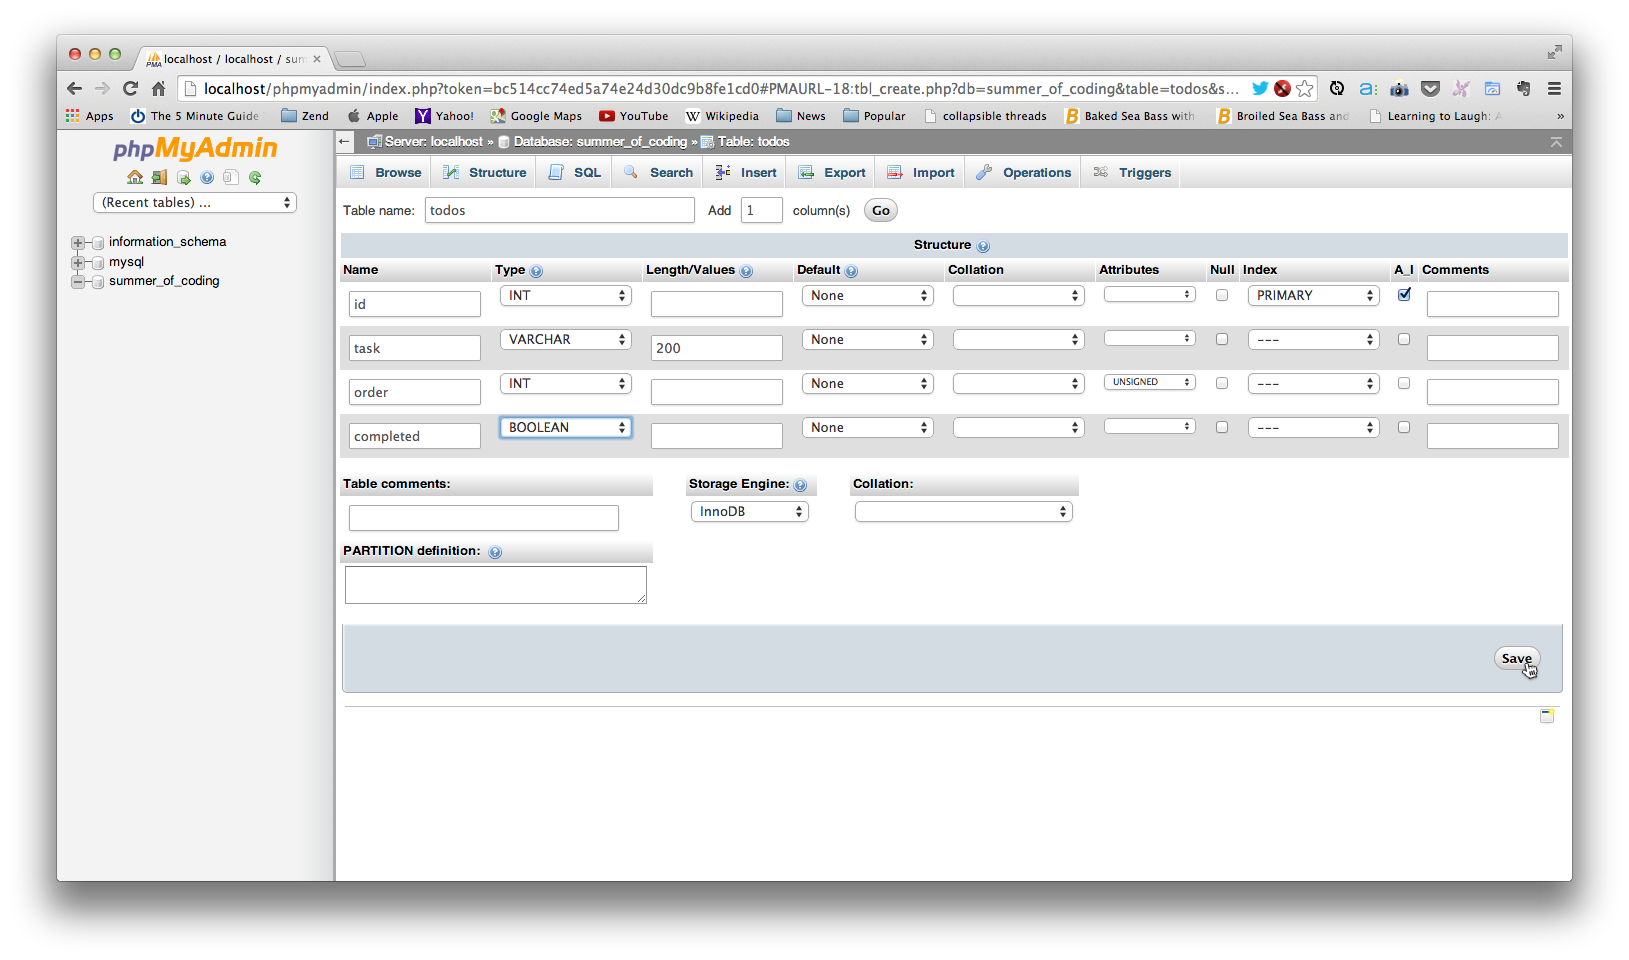
You should now see your new todos table appear in the left-hand column.
Adding some todos to our database
Now that we have our “file folder”—our database table todos—let’s add some “documents”—or records (representing todos, in this case)—to it!
First, click “todos” in the left-hand column, and then click the “Insert” button/tab at the top. From here, we can add a few todo records to our table.
Think of a couple of tasks and fill in their information in the interface under the “Value” column, as shown in the image below. (Remember, you should not fill in the id column, as it’s value is populated automatically). For now, you can just explicitly assign order values—1 for the first task, 2 for the second, and so on—and 0 for the completed values, designating that the items have yet to be completed.
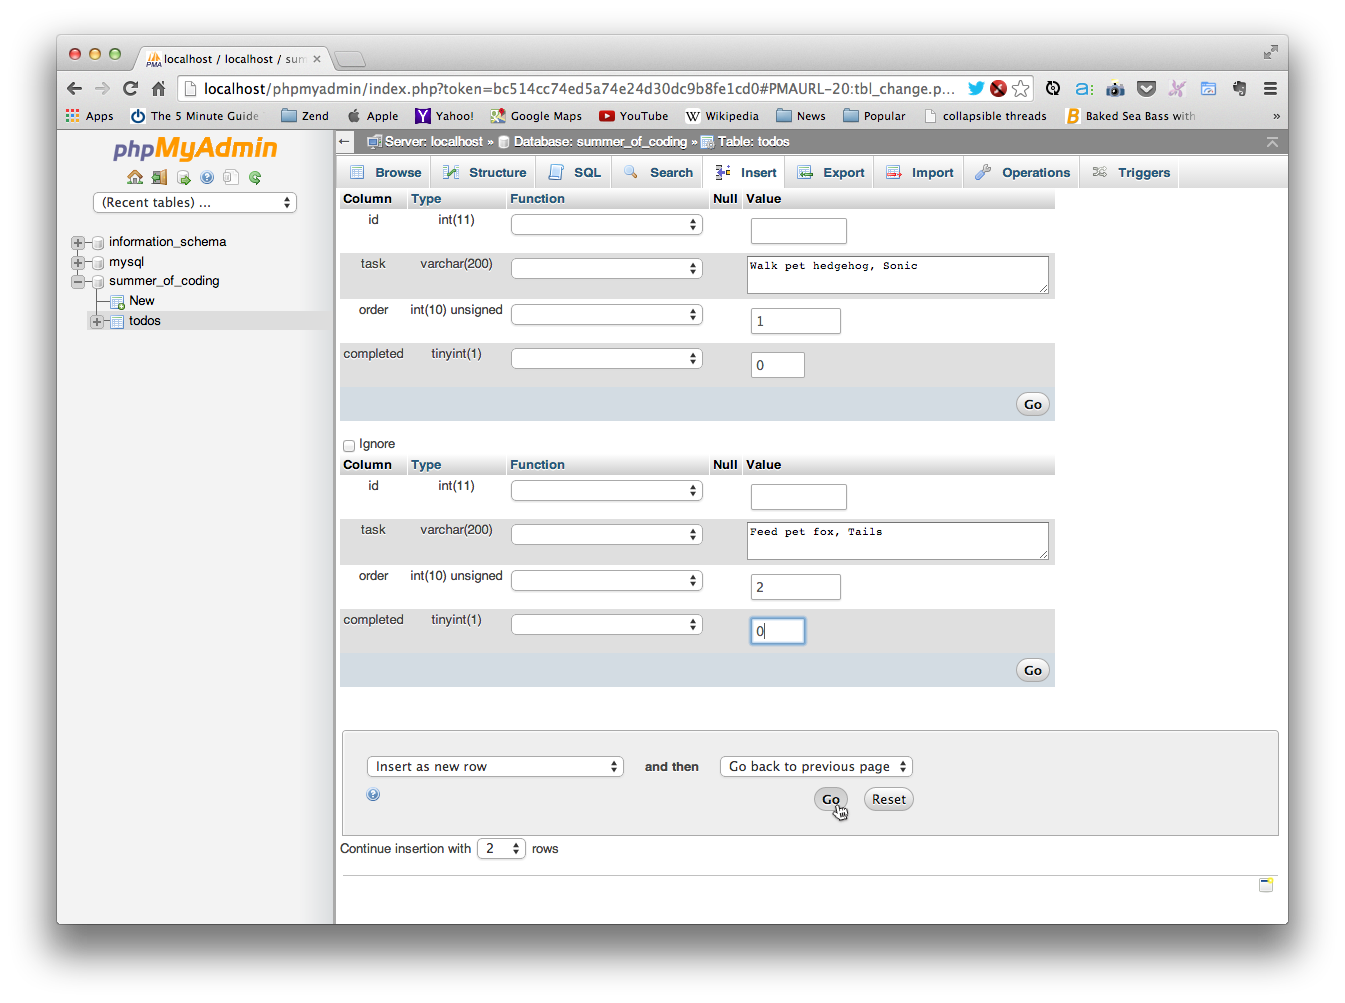
Once you’ve entered the information for a few todos, click the “Go” button at the bottom of your page to create the new entries in the database table.
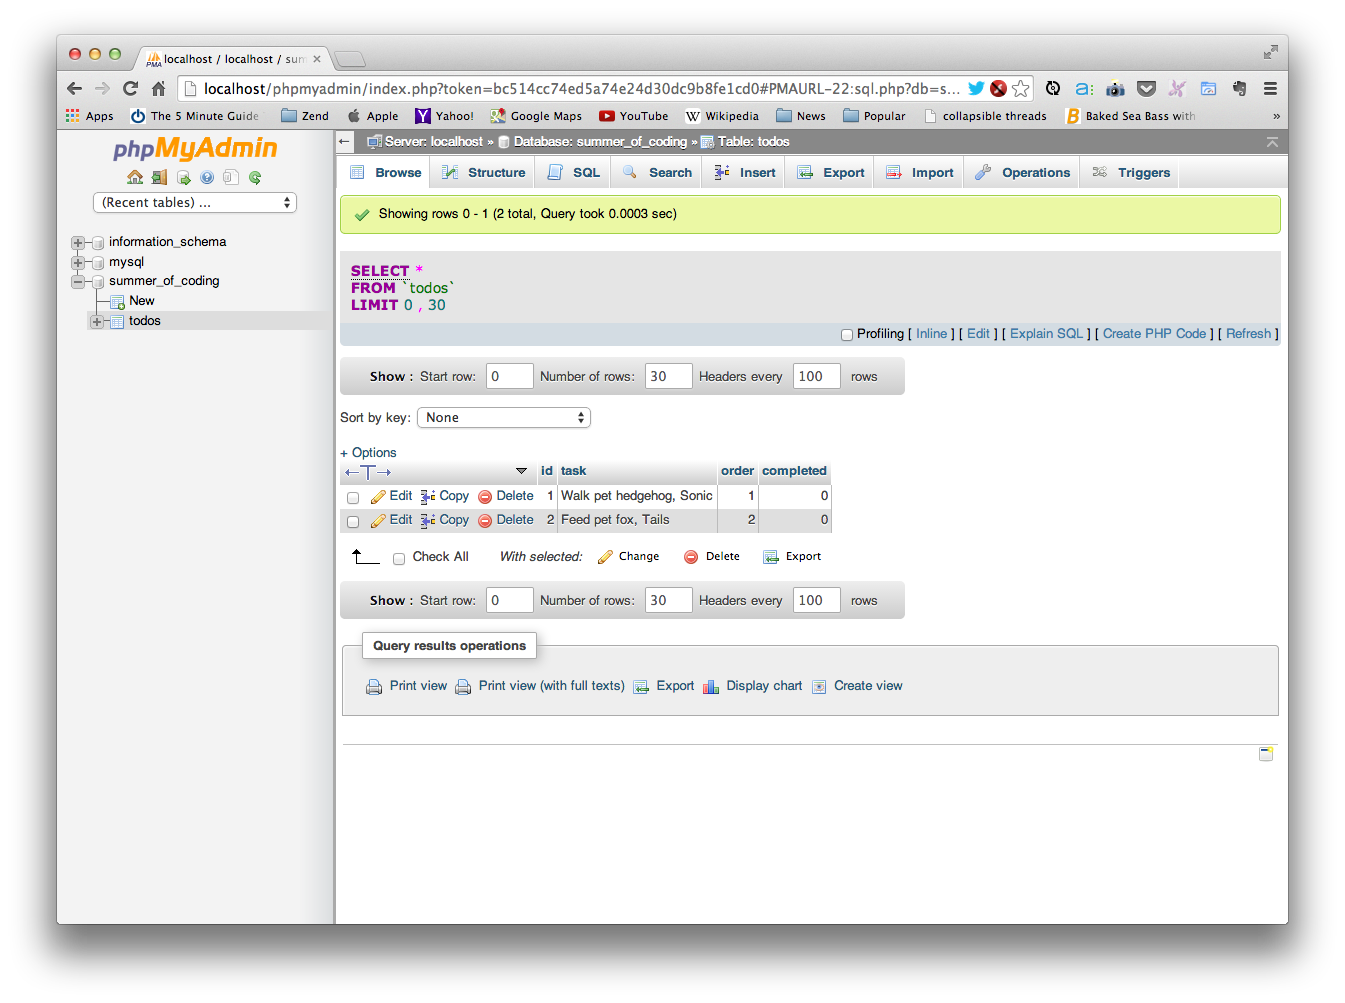
Now if you click the “Browse” tab/button at the top of your screen, you should see your new todo entries listed, like so:
2. Retrieving some data
Running a query
Now that we have some todos in our database, let’s try retrieving a few, using a query.
Click the “SQL” button/tab at the top of your screen and you’ll see a large input box where we can enter SQL code. Start by simply retrieving all of the todos by entering the following and clicking the “Go” button:
SELECT * FROM todosYou should see a resulting list of all of the todos in your database, which is exactly what we expected. We told the database “select [all information] from [our todos table]”.
Now it’s your turn.
Using this MySQL query basics sheet, try running some queries of your own on the todos table.
Here are a few things to try:
- select only specific pieces of data (e.g. just the task description)
- select items based on certain criteria (e.g. whether or not a todo is completed)
- select the items ordered in a certain way
- insert a new item
- delete an existing item
Leave a comment below with the one of the queries you ran explaining what it did. Did you experience anything unexpected? Figure out any neat tricks?
Congratulations for making it this far! The construction of your very own web app is now underway! You now know: what a database is; the different types of data that can be stored in it; how to create your own database; and how to add records to, and retrieve records from, it.
Next week we’ll be learning about all of the different parts of a web app and how they function together.