This is a continuation of the Laravel 5 Application Form Model Binding tutorial where I showed you how to create a Laravel form with model binding for creating new cars (using an example Car model).
Model validation is the method of establishing rules to ensure when you’re creating, or updating, an object based on a model, that all of its field values are set appropriately. That all required fields are filled, that all date fields are formatted properly, etc.
Installing the Esensi Model Traits Package
We’re going to use the Esensi Model Traits package for model validation.
To install it, open up your app’s composer.json file and add its entry:
  "require": {
    // …
    "esensi/model": "0.5.*"
  }
Next, open the command line, move into your application’s main directory (remember to connect to your virtual machine first if you’re using Homestead), and update Composer to install it:
$ composer update
Finally, to activate the Esensi functionality in the Car model, simply replace:
use Illuminate\Database\Eloquent\Model;

class Car extends Model
// …
with:
use \Esensi\Model\Model;

class Car extends Model
// …
And then you can establish the model’s validation rules by adding a $rules array to the model:
class Car extends Model
{
    protected $rules = [
        'make' => ['required'],
        'model' => ['required'],
    ];
}
The $rules array defines rules for any/all of the model’s fields, and you can use any of Laravel’s built-in validation rules in the individual fields’ rules arrays.
With that established, we can build out the store action in the CarController to handle the Create Car page’s form submissions.
Handling Form Submissions
To start, in the store action, we create a new Car object, populate it with the submitted form data, and then attempt to save it. The save function returns a boolean value, so if it fails — thanks to the Esensi model validation — we can act accordingly, inside that if statement.
And if it succeeds, we can handle that below the if statement (which it will never hit, in that case).
  public function store(Request $request) {
    $car = new \App\Car;

    // populate the model with the form data
    $car->make = $request->make;
    $car->model = $request->model;

    // save the model to create a new object in the database
    if (!$car->save()) {

    }

    // success!

  }
Upon failure, we need to: retrieve the validation errors; redirect back to the create page, passing along those errors & the submitted form data (for repopulating the form).
And if it succeeds, we redirect back to the create page (or another page of your choosing), and pass along a “success” message.
Both scenarios are demonstrated here:
  public function store(Request $request) {
    //…
    // save the model to create a new object in the database
    if (!$car->save()) {
      $errors = $car->getErrors();
      return redirect()
            ->action('CarController@create')
        ->with('errors', $errors)
        ->withInput();
    }

    // success!
    return redirect()
      ->action('CarController@create')
      ->with('message', 'Your '. $car->make . ' '
                . $car->model . ' has been created!');
  }
Esensi provides the getErrors function to retrieve the validation errors, and then we pass them along via the redirect using the with function.
And Laravel provides the withInput function to pass along all of the form data that was submitted. And thanks to the use of the Forms library’s Form::model function (in the Laravel 5 Application Form Model Binding tutorial) to create a form with model binding, the form will automatically be repopulated without writing any additional code.
Last step: to display those status messages in the view.
Displaying Status Messages
When you pass data during a redirect, it’s “flashed” to the session, meaning it’s only accessible on the next page load. You retrieve session data in Laravel using the session function, passing the key of the object, you’re looking for.
Both the errors object (which contains the validation errors) and the success message were passed using the with function, so you can retrieve both from the session:
      // …
      <div class="page-header">
        <h1>Create a Car</h1>
      </div>

      @if (count(session('errors')) > 0)
      <div class="alert alert-danger">
        @foreach (session('errors')->all() as $error)
          {{ $error }}<br>
        @endforeach
      </div>
      @endif

      @if (session('message'))
      <div class="alert alert-success">
        {{ session('message') }}
      </div>
      @endif

      // …
You call the all function on the errors object to retrieve an array with all the error messages. And then you can just loop through and print out each one, wrapping them in a Bootstrap alert.
And for the success message, we just look for it, and, if found, print it out in another Bootstrap alert.
So now, if you submit the form without all the required values, you’ll see the validation errors appear.
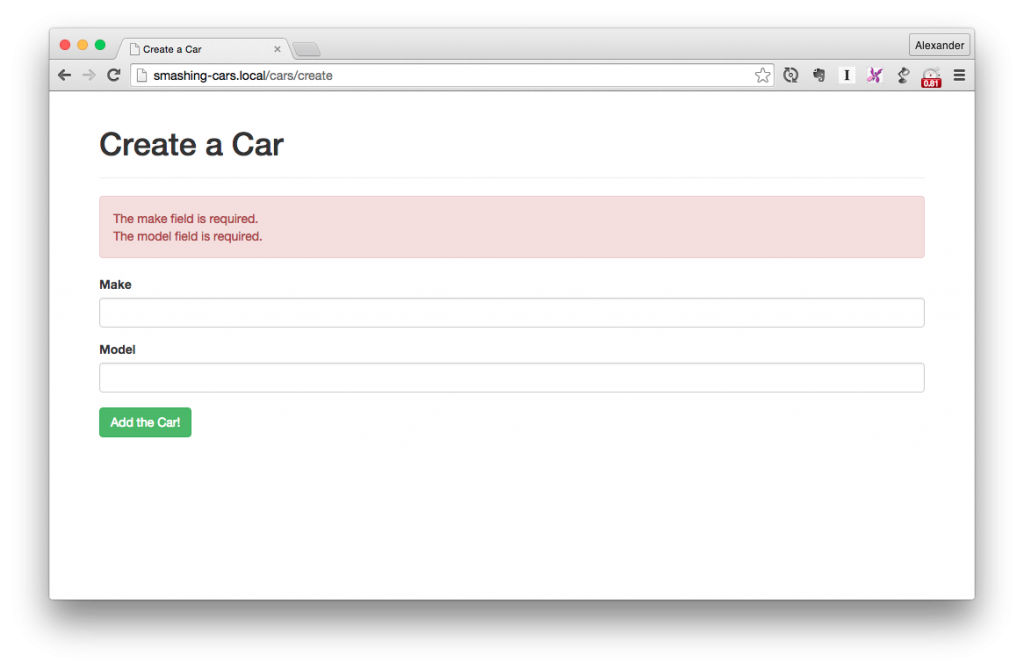
The create page displaying validation errors, produced thanks to Esensi
And if you submit the form with all the required data, the car will be created and you’ll see the “success” message.
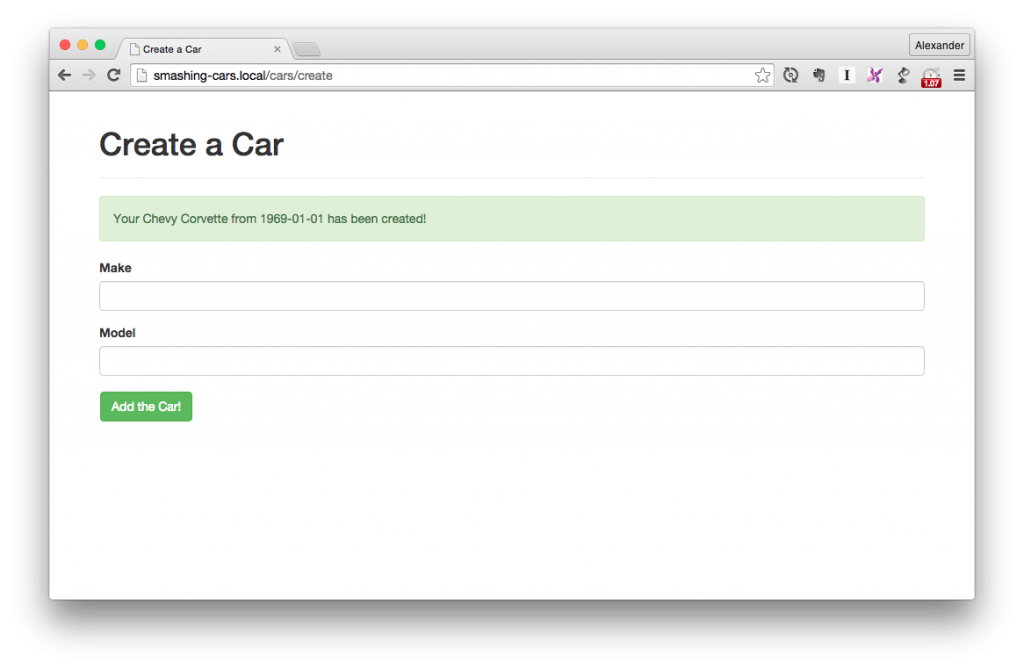
The create page after a successful object creation
Great success! As you can see, the Esensi Model Traits package makes model validation a breeze.
