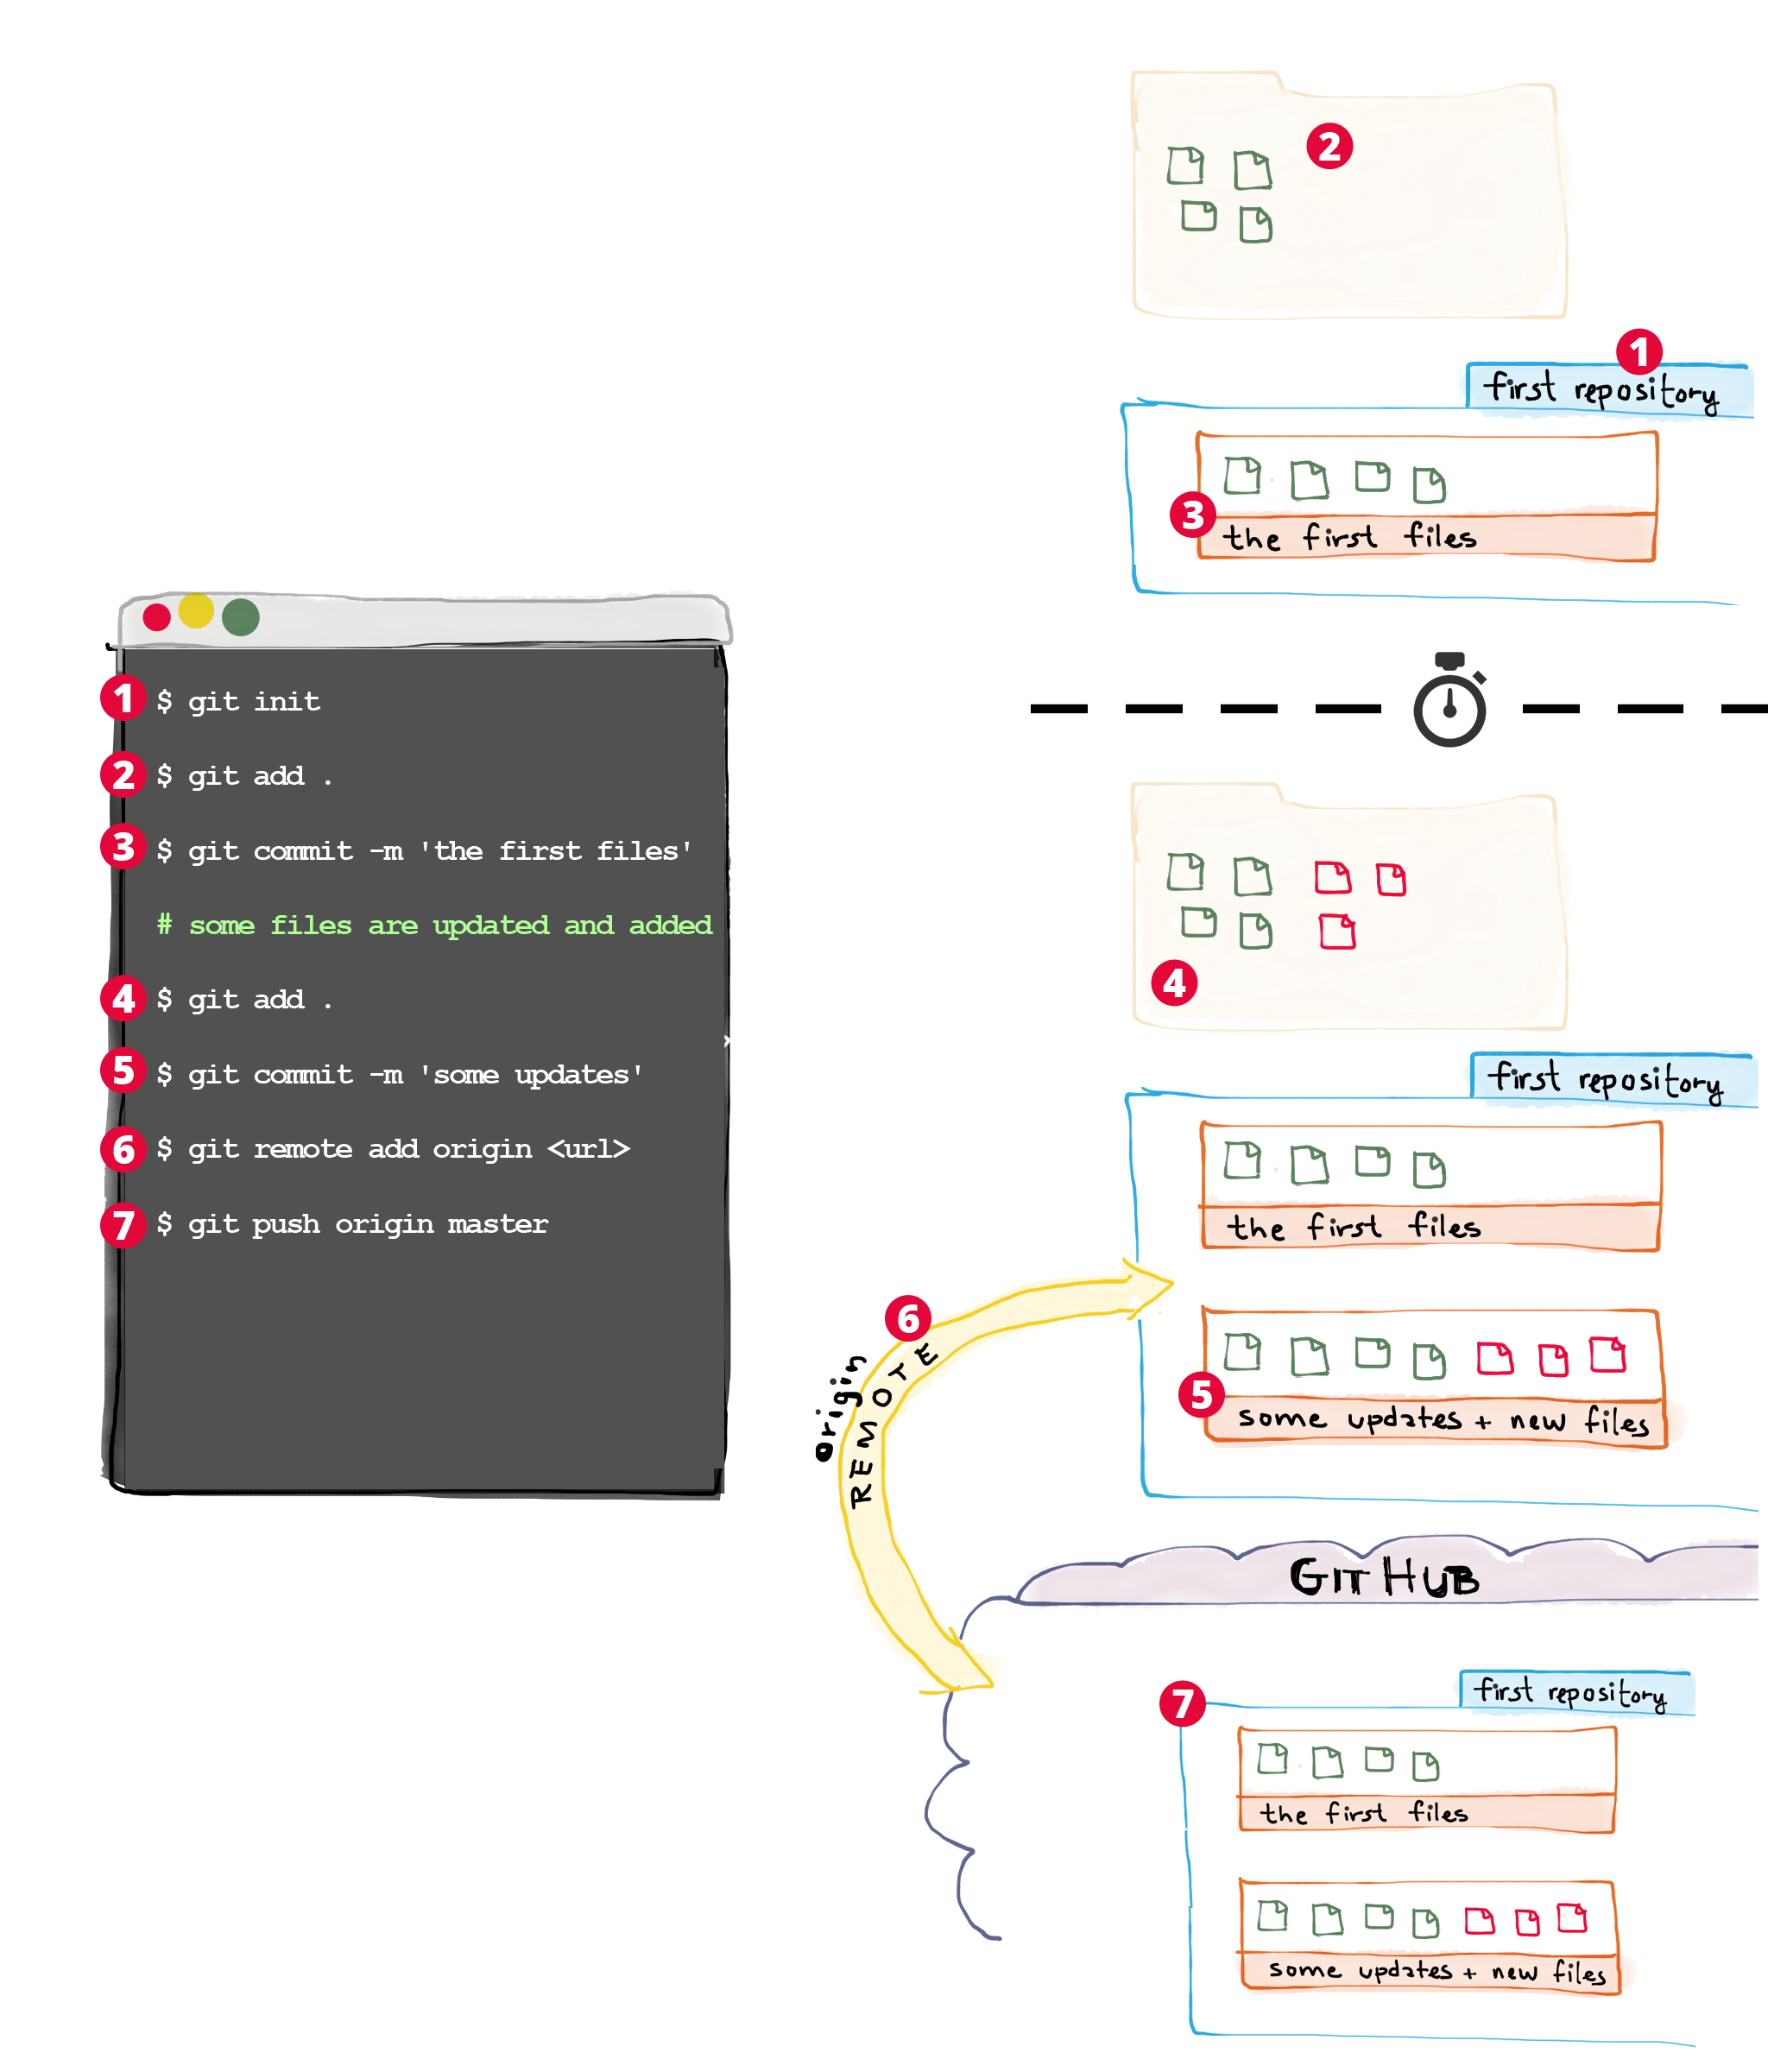
Git is a “revision control system”. Basically, what that means is: it lets you save different “revisions” of your code files and keep track of the changes you make over time. In Git, a group of code files is known as a repository.
GitHub is an online application for hosting, or backing up your Git repositories. It’s great because, as long as you consistently move all of your files up to GitHub, you’ll always have a reliable backup, even if you somehow lose all of your local files (say, if your hard drive crashes).

A depiction of the entire process of basic Git and GitHub operations (click to view full size image)
The process
Here are the basic steps involved with creating a Git repository; adding files to it; and moving copies of all of those files up to GitHub.
1. Create a new Git repository on your computer
From the command line, while inside the folder with your files, run this command to initialize a new Git repository:
$ git init
2. Add (i.e. “stage” in Git terms) your files and create a new “revision” (i.e. “commit” in Git terms)
The following command adds all of the files in the current directory, preparing you to create your new “revision”.
$ git add .
To create the “revision”, or commit in Git terminology, run the following, supplying a commit message explaining the files:
$ git commit -m 'my first files'
3. Open your GitHub account in your browser and create a new repository to which you can move up (i.e. “push” in Git) all of your local files.
Once you’ve created the repository, copy its HTTPS URL at the top of the page, as shown:

The repository HTTPS URL in GitHub (https://github.com/alexpcoleman/demo-app.git in the repository pictured)
4. Establish a connection (i.e. “remote” in Git) between your local repository and your GitHub repository
Use the following command to create a connection, a remote in Git terms, between the repository on your local computer and the repository on GitHub:
$ git remote add origin <your-github-repository-https-url>
You can verify that the remote was created properly using the following command, which lists all remotes associated with the repository:
$ git remote -v
5. Push up your local repository files to your remote (GitHub) repository
And finally, move, or push in Git terms, up all of the updates to the GitHub repository via the new origin remote:
$ git push origin master
The terms
- repository — in Git, this is what you call a set of code files
- staging — when using the Git
addcommand, you “stage” files, preparing to create a new “revision”, or commit - commit — a “revision” of your repository
- remote — a connection established between the two Git repositories
- push — moving repository changes to another, connected repository, via a remote
Updating your Git repositories
So then, to update your existing Git repository, you need add, or stage your new and/or updated files:
$ git add .
Create a new revision, or commit:
$ git commit -m 'your message here'
And then push those updates up to GitHub:
$ git push origin master
A few other very useful commands
$ git status
After you’ve run a “git add .” command, this “git status” command will show you all of the files you’ve added (i.e. “staged”) that would be a part of your next revision (i.e. “commit”).
$ git reset
This will unstage all of your files. You can use this in case you accidentally add files you aren’t yet ready to commit.
$ git log
This will show you a log of all your past commits, including the times they were committed and their commit messages.

