This is the third installment of Behind the Scenes: The Creation of a Web Application. Check out the previous articles on planning a web application and creating web application wireframes.
We’re two-thirds of the way through planning our web app.
Objectives: check.
Wireframes: check.
Next up: designing the application’s database.
But first, let’s briefly discuss how a database works.
How a database works
You can think of a database as a sophisticated, digital filing cabinet. It will help us organize all of our app’s data. We can add, update, and remove pieces of data from our database, at will.
Databases are comprised of tables, which you can think of as file folders.
Tables are comprised of records, or rows, which you can think of as individual documents within one of the file folders, as shown below.
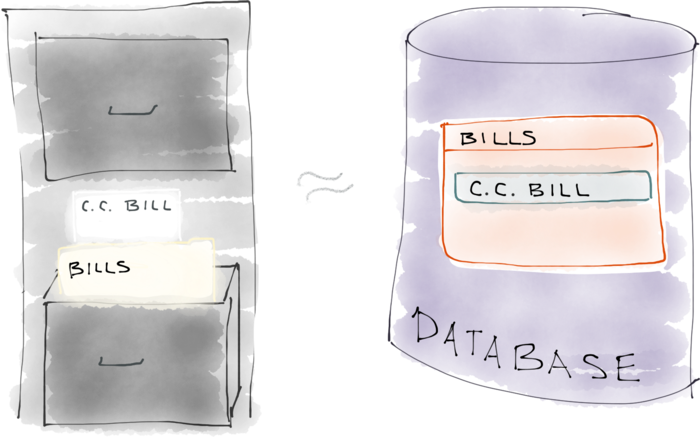
A database is like a digital filing cabinet
So say, for example, we have a filing cabinet to store information about our finances, and it contains a folder labeled “Bills Paid”. Within that folder, we have records of payments for various bills. We can store data in a database in the same exact way.
Say we have a database, and it contains a table named bills.
We can add new records to that table each time a bill is paid, just as we would add new pieces of paper to our file folder.
Each record represents an individual object — a bill, in this case — that contains various pieces of information, such as the bill number, amount, and date paid.
As we build our app, we’ll be constructing it around the roles of the different types of objects involved, which we’ll define in just a minute. This is known as object-oriented programming.
Object-oriented programming
In object-oriented programming, or OOP for short, the data throughout the app takes the form of objects. So instead of thinking of single pieces of data on their own — “This is the name of a course.” — we think of objects as self-contained entities — “This is a course object, which has a name and a description.”
So our next step is to isolate the different types of objects involved in our application.
Our application’s objects
To start, let’s take a look at our application’s objectives again:
- Display course content
-
- View course overview (name, lessons)
- View individual lessons
- Allow others to view and interact with courses
- User accounts (login, logout, basic info.)
-
- Profile with subscribed courses
- View course overviews
- View course lessons
- Complete course lessons
- Ask questions / give feedback
- Administer course content
-
- Restrict access to admins only
- Add/edit/delete courses
- Add/edit/delete lessons
- Process course subscriptions
-
- Process payments
- Grant user course access
Two types of objects in our app are immediately obvious: courses and users. The others are slightly more disguised.
The third object will be (course) lessons. Lessons may belong to courses, but they are still their own, substantial type of object.
And finally, we have subscriptions, a connection between a user and a course. Note that, just as there is a relationship between courses and lessons (i.e. lessons belong to courses), subscriptions also involve a relationship, one between users and courses.
In the database, data for each type of object is stored in its own database table, and relationships between objects are represented by connections between the tables.
In summary, the final list of our web app’s object types is as follows:
- courses
- lessons
- users
- subscriptions
Now we need to go through and determine what pieces of information are associated with each object. But you’ll notice that this will be a trivial task, as we already defined most of these individual pieces of information when we designed the application’s wireframes.
Courses
Courses are simple, as most of their information is stored within their lessons. They require only the following:
- name
- description
Lessons
Lessons contain slightly more information:
- course
- name
- content
- sort order
Note the first, bolded item: course. That represents a connection to the courses table designating “this lesson belongs to course”.
Users
We’re just concerned with basic user account information for users:
- password
- name
Subscriptions
As mentioned previously, subscriptions are really just connections between users and courses. And that’s exactly the information they’ll contain:
- user
- course
This will designate that “user is connected to (i.e. subscribed to) course.”
The complete database diagram
Now that we have defined our objects and their associated pieces of information, we can directly translate them to a complete diagram of the database, as shown below.
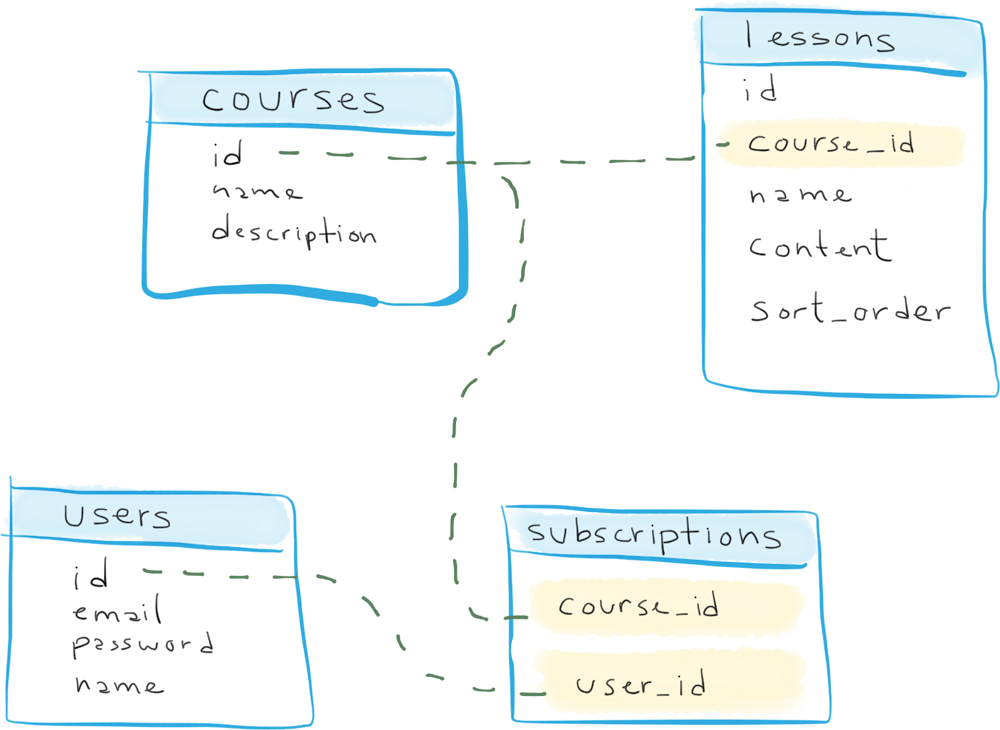
The online course web application’s complete database diagram
Note that each object is contained in its own database table, and the object-to-object connections are designated by connections between the tables.
Next time, we build!
Next time on Behind the Scenes: The Creation of a Web Application, we’ll begin development!
I’ll be putting all of the great plans created thus far to good use, creating initial versions of all of the application’s pages.
Stay tuned!
