This is the sixth installment of Behind the Scenes: The Creation of a Web Application, the series following the construction of an entire web application, from start to finish.
Last time, we brought our app to life, establishing the first few fully-functioning pages. But you may have noticed something… There was no sign of users or user authentication anywhere in the application.
And there’s a reason for that.
Layering user functionality on top
When building a new web application, some people like to start by implementing the user-based functionality. I, on the other hand, find it much easier to build the other core functionality first — the course and lesson functionality, in the case of this app — and then integrate users.
That way, by the time you’re integrating the user functionality, you already have a clear picture of how the rest of the data is flowing throughout the app. This makes it much easier to define a clear-cut set of goals and restrictions when implementing the user functionalities.
The main aspects of user integration
When integrating users into an application, there are three main aspects to consider:
- 1. Representing users in the database
- 2. User authentication (and accounts)
- 3. Access control
We already addressed number one — representing users in the database — back when we designed the application’s database. So it’s numbers two and three we’re concerned with now.
The purpose of user authentication
Even if you aren’t aware of it, you’re already familiar with the main aspects of user authentication: logging in and out.
And at its core, that’s really all there is to user authentication itself. The purpose of logging in is to let the application know who you are, so it can grant you the necessary privileges throughout (or restrict you from accessing certain things).
That concept — of granting and restricting access — is known as access control.
Access control determines what users can (or can’t) access
Let’s take our online course web application as an example.
In the app, there are courses. But as we established in the planning stages, users are only supposed to be allowed to access a course if they have a proper subscription for it.
As pictured below, access control within the application will function like so:
- User logs in (i.e. authenticates)
- The application is now aware of who the current user is
- The user attempts to access a course
- The application checks to see if the user has a subscription for the course…
- If so, they’re allowed to view it
- If not, they’re denied access
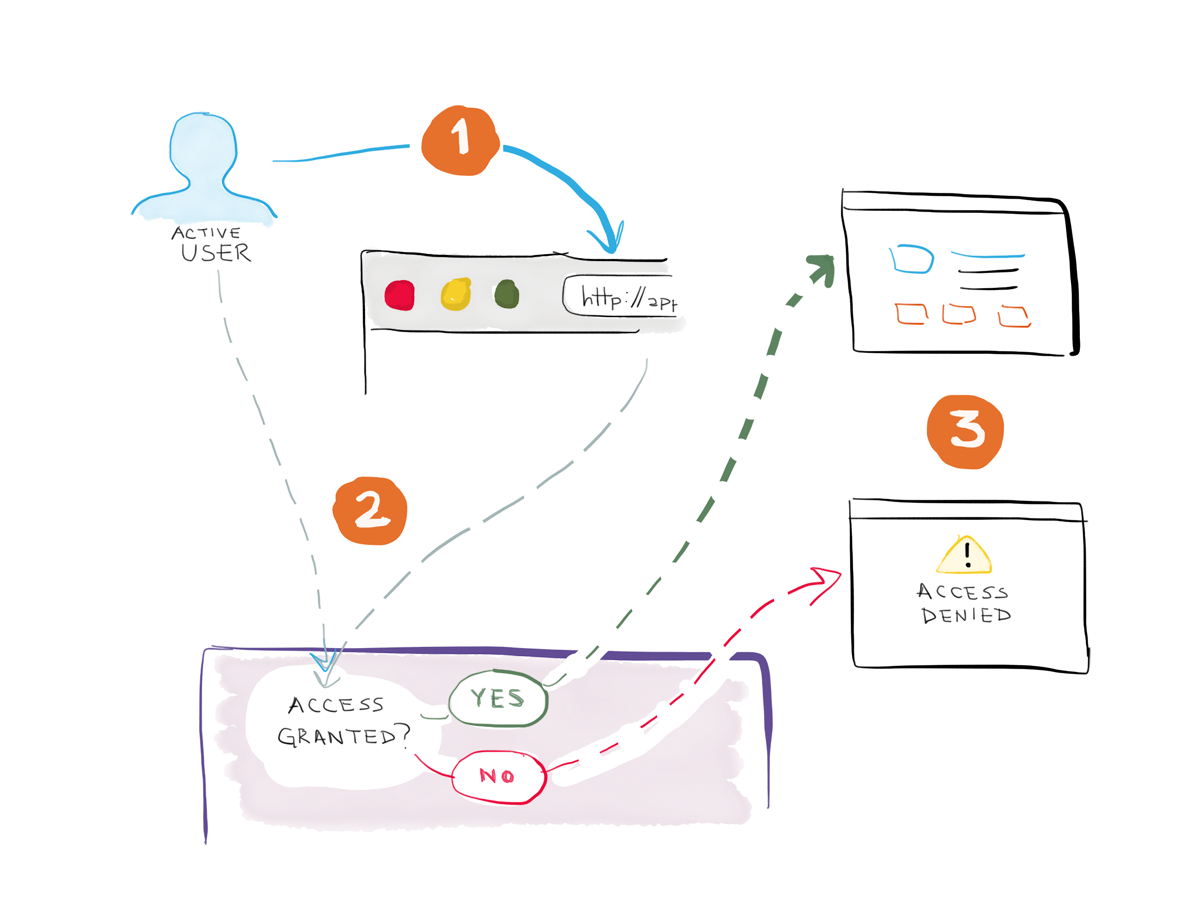
Using user access control to restrict access in a web application
Needless to say, if a user is not logged in, they won’t be able to access any courses.
In addition to access control, when a user is logged in, the application also has the ability to create and store data specific to that user.
User-specific data
Again, let’s use our application as an example.
When planning the application, we established that users would be able to mark course lessons as “complete” once they finished them. For this to work in practice, the application needs to be aware of who the active user is.
This mark-as-complete functionality will operate in the application like so:
- User X is logged in and is viewing a course Lesson, Y.
- They finish the lesson and click a Complete button.
- The application adds an entry to the database designating that User X has completed Lesson Y.
- Now, next time they’re viewing the course, we can access that piece of information and designate that they’ve completed that lesson.
Now that we have an idea of the different aspects of integrating users into an application, let’s take a quick look at the additions required to make this new functionality a reality.
Additions to the application
There are a few new things we’ll need to add to the application:
- A Login page
- Authentication functionality (to process logins and logouts)
- Interface alterations based on a user’s login status (e.g. when a user is logged in, show them a Logout link in the main menu; when logged out, show them a Login link)
- Access control functionality
I’ve updated the live course application to include all of the user-related functionality discussed above.
The live course application demo, updated
You can view the updated application here:
Access the live course application demo
And you can login with the following credentials:
Email: user@example.com
Password: secret
You’ll notice that, unlike last time, if you try to access the Demo Course page without logging in, you’ll be denied access and sent to the login page. User access control in action.
You’ll also see that you can mark lessons as “complete”. (Although if there are multiple people logged into the same test account, things could get a bit wonky!)
Play around with everything, and leave a comment below to let me know what you think.
