This is the fifth installment of Behind the Scenes: The Creation of a Web Application. With the web application planned (objectives, wireframes, database), we discussed MVC last time to prepare to start building the app.
Previously, we discussed MVC, the Model-View-Controller pattern that will guide the creation of our web app. Now it’s time to put those principles into action to create the application’s first pages.
As a refresher, the MVC flow is pictured below. Let’s walk through how we’ll use MVC and its pieces — models, views, and controllers — to create those pages.
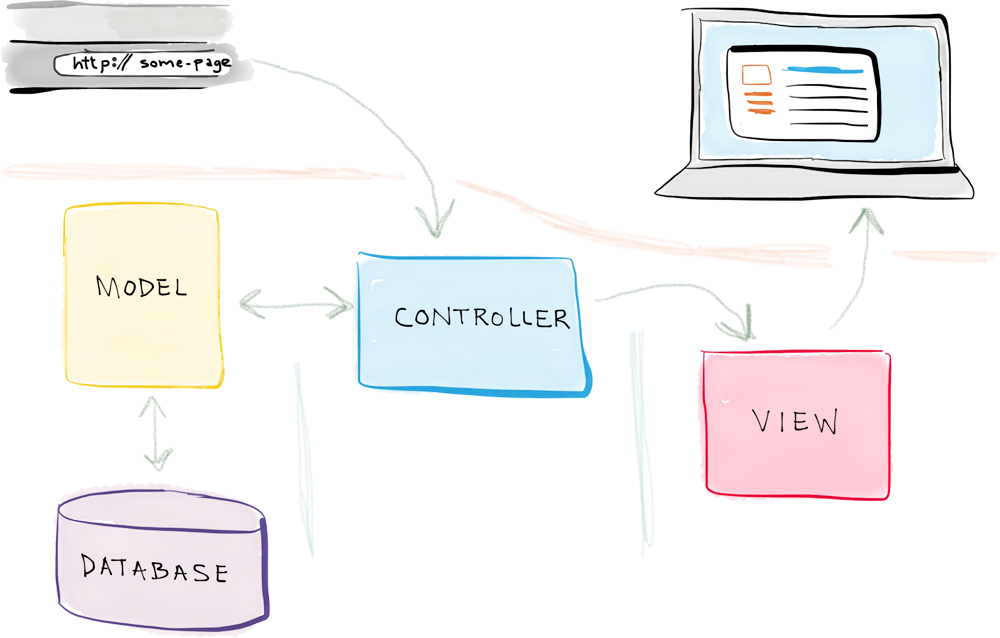
The flow of a request in an MVC web application
Controllers handle user requests
To start, user requests are handled by controllers.
It’s generally best practice to create one controller for each related set of pages, which frequently correspond with the different types of objects in the web app.
If you recall, we previously discussed object-oriented programming, which is based on structuring the application around its different types of objects — courses, lessons, users, and subscriptions, in our case.
In our case, taking a look back at the application’s wireframes, we have three main page types: course-related, lesson related, and user-related. As such, we’ll create three controllers: one to handle course-related requests, one for lessons, and one for users.
But in order to handle all of the requests, we’ll frequently need to retrieve data from the database. That’s where models come in.
Models help retrieve data
Recall that models interact with the database.
And, in fact, we’ll also create an individual model for each different type of object. So (for now) we’ll have a course model, a lesson model, and a user model.
When a controller needs to retrieve course-related data from the database, it will call on the course model; lesson data, the lesson model; and so on.
When all of the necessary information has been culled, it’s passed to along to a view.
Views render pages
The views in a web application are used to generate the content displayed to a user in their browser. You create one view for each individual page.
In a view, the information sent by the controller is retrieved and used to generate all of the page’s necessary content.
And in order to rapidly create nice-looking pages, I use the Bootstrap framework.
Using Bootstrap to aid page creation
Originally created by a few Twitter developers, Bootstrap is a framework that allows for rapid prototyping of an application.
It consists of a single CSS stylesheet (+ a few custom font files) and a single Javascript script, which provide CSS classes and JS functionality that can be used to easily create common page elements.
Let’s walk through the process of creating two course-related pages — the course overview page and the course lesson page — and you’ll really get a taste of how useful Bootstrap is.
Creating the Course Overview page
The original wireframe for the Course Overview page is shown below. Recall that it’s used to display the course’s basic information as well as links to all of the course’s individual lesson pages.
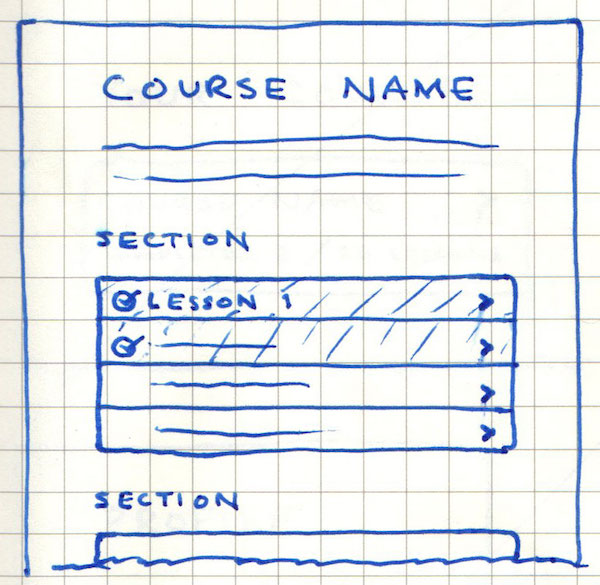
Course Overview Page Wireframe
In terms of MVC, a full request for the course overview page will work like so:
- The User makes a request to view the page by visiting URL such as
courses/<course-name>. - That request is handled by the course controller.
- Within the controller, we use the course and lesson models to retrieve the data needed to render the page:
-
- Core course info.
- Lessons
- That data is passed to the course overview view, which renders the page.
That final page is pictured below. Note that, thanks to the use of Bootstrap’s built-in CSS classes, the page looks pretty nice, right off the bat.
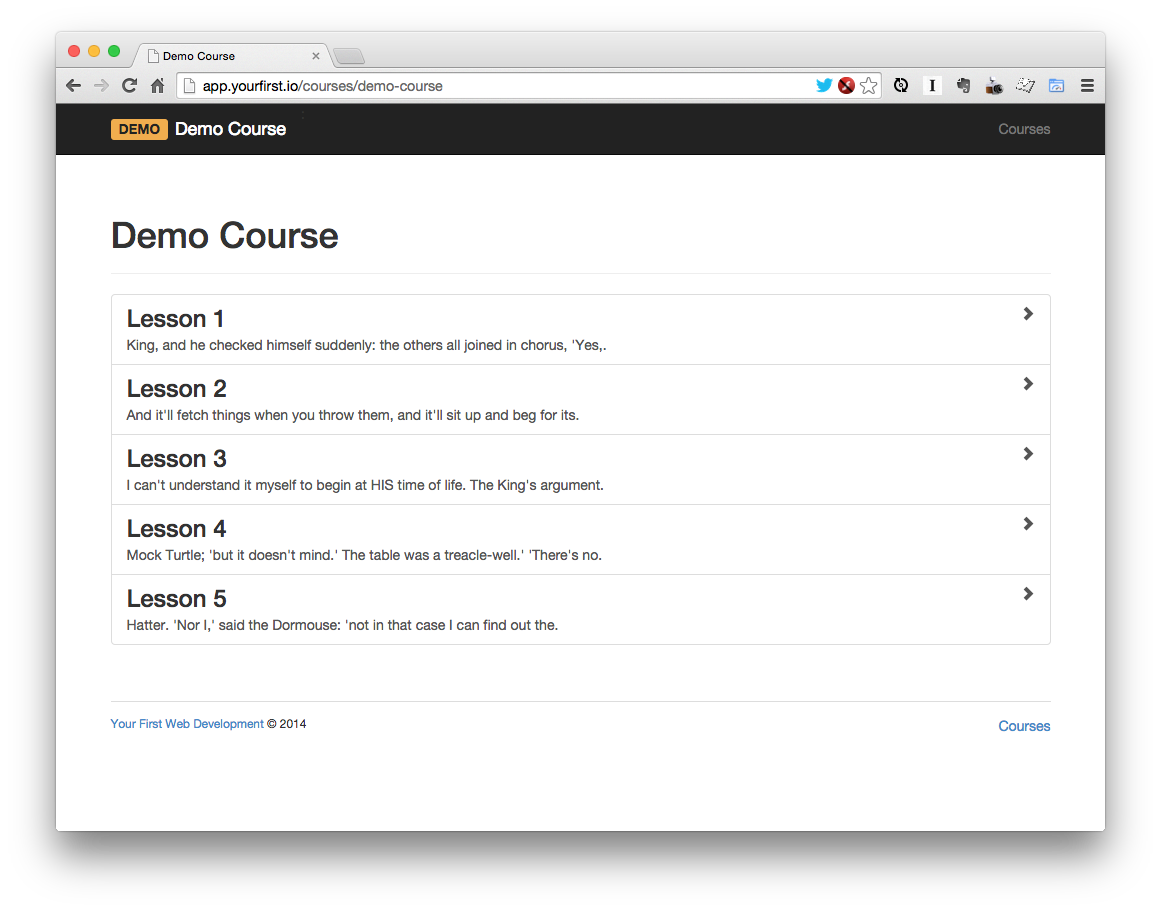
Initial web application’s course overview page
And, in fact, a demo of the course application is now live. You can view the demo course I created and see the initial pages in action in the wild.
Back to the course overview page, clicking one of the lessons sends you to its individual course lesson page.
The Course Lesson page
The original wireframe for the course lesson page is shown below.
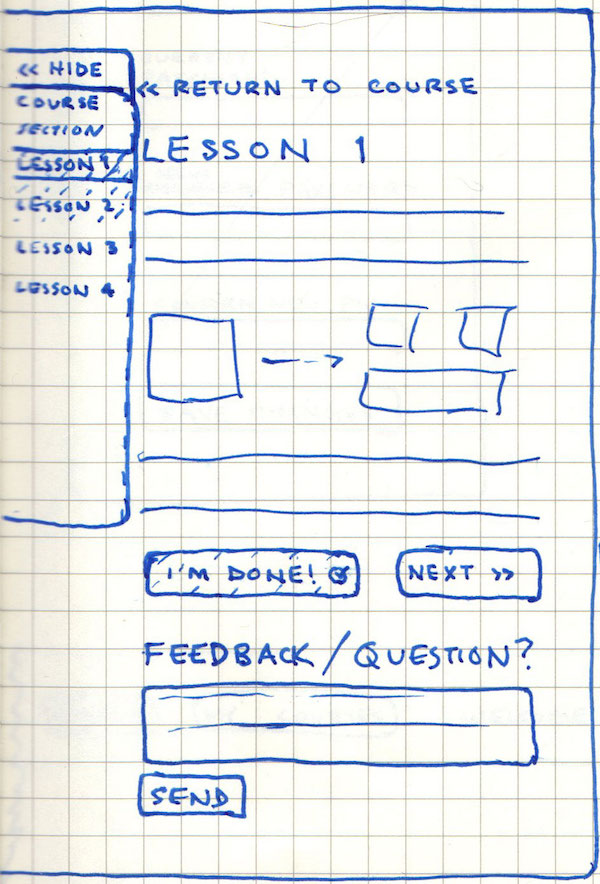
Course Lesson Page Wireframe
And the process used for this page is exactly the same: user request → controller ↔ model ↔ (back to) controller → view.
The resulting course lesson page is shown below.
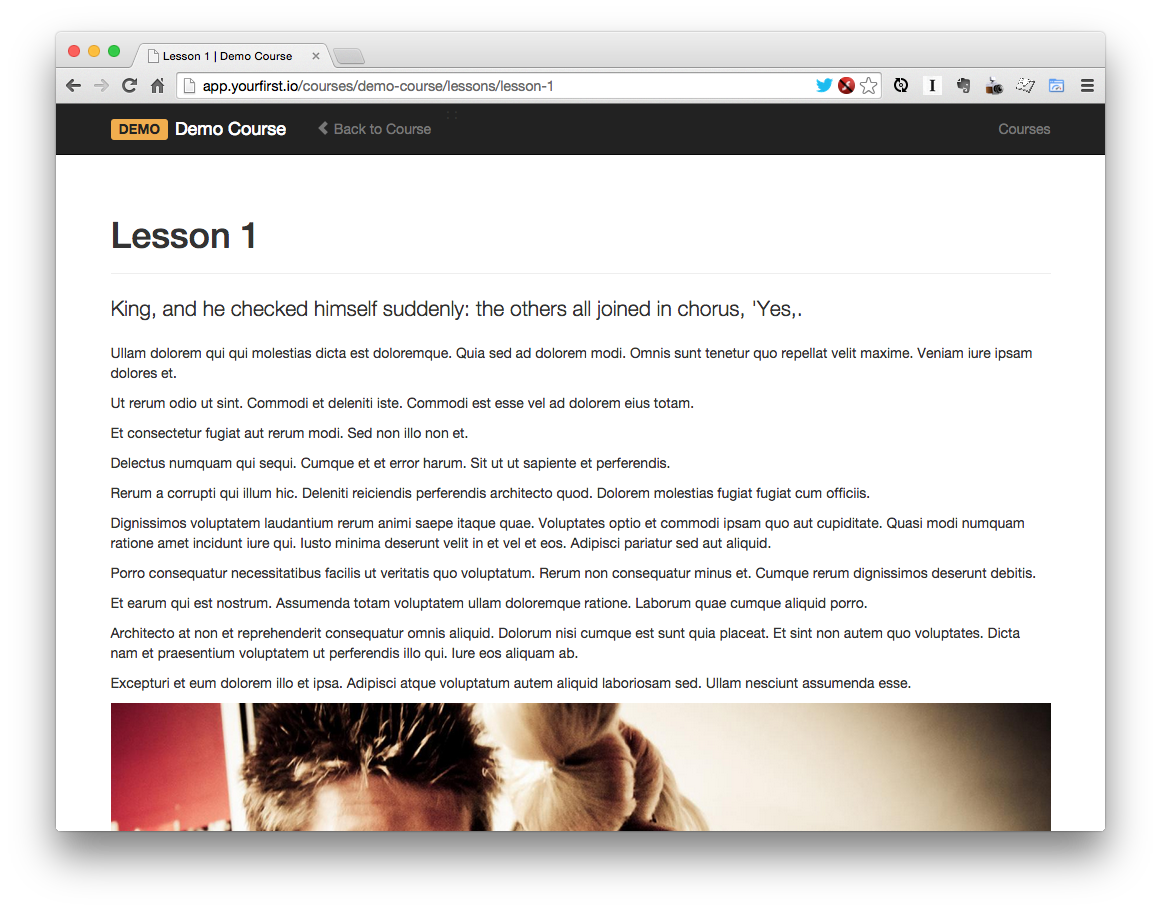
Initial web application’s course lesson page
Rinse and repeat. The same exact process will be used to create all of the other pages.
The demo application is live
The initial version of the application is now live!
All of the core course-related pages are in place. Feel free to play around, and leave a comment below with your thoughts.
